Here we are going to describe how to mount and program our own RC car with a webcam streamer using a odroid board, with a web server and a tcp server writed in python, one arduino nano, using the ecat library for control the motors. And a QT5 program used as a remote control on a laptop.
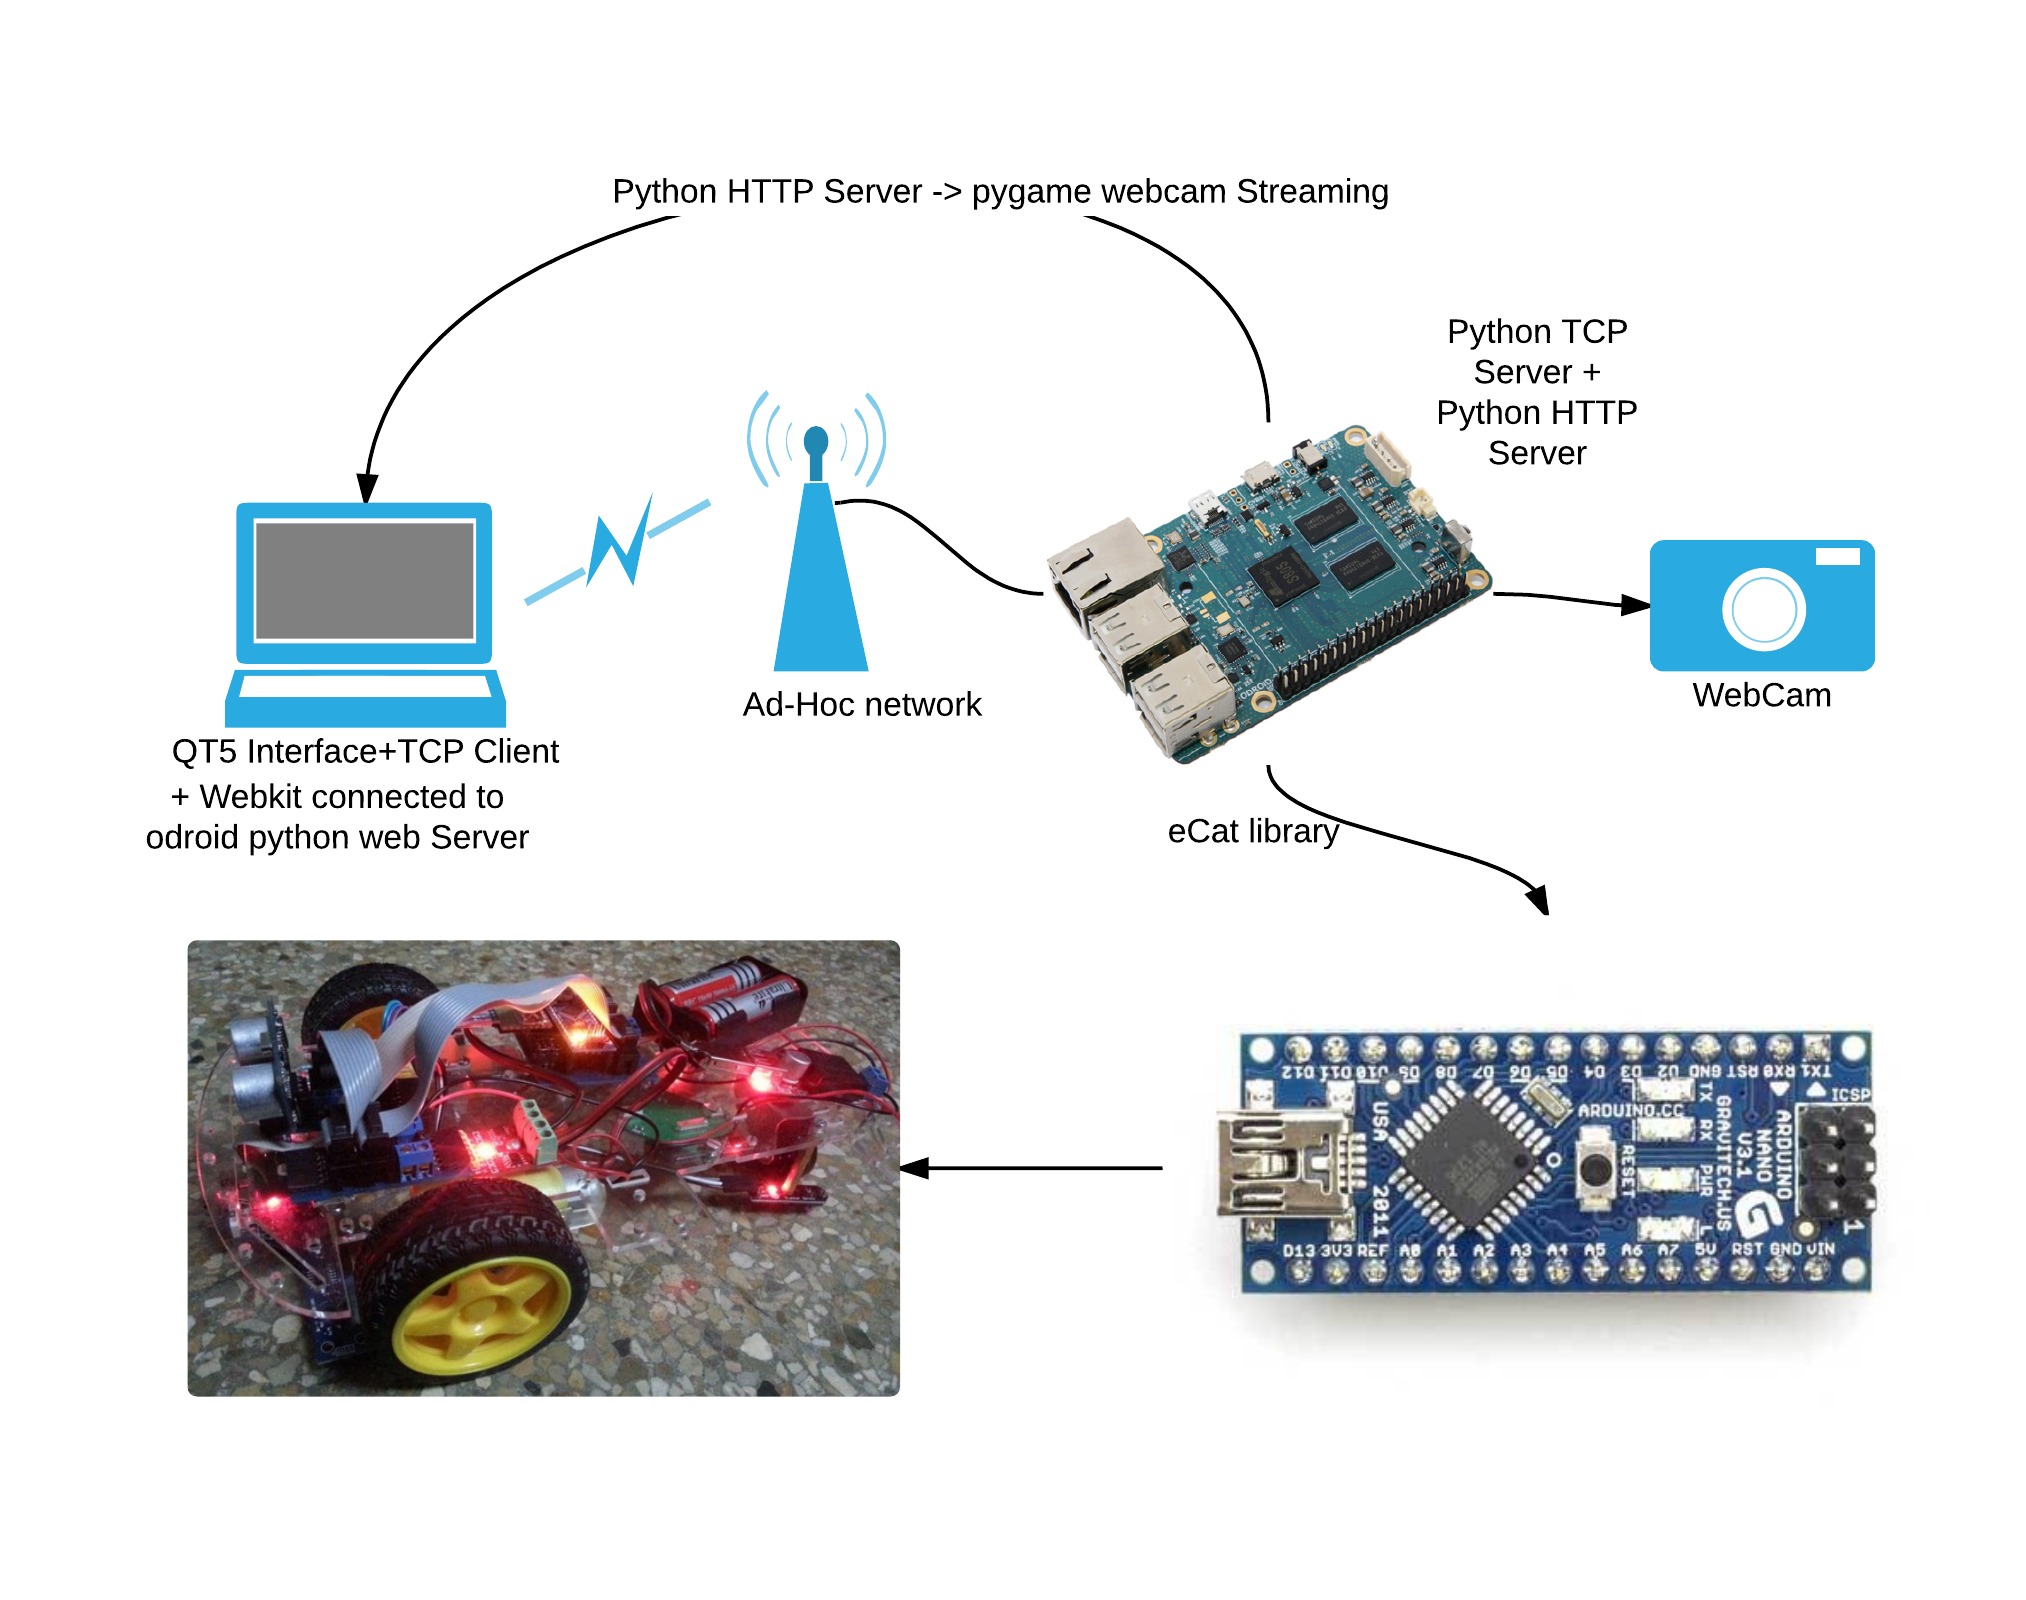
This is the schema:
How to make our own RC car with webcam streaming? Easy, first of all, we need:
Hardware components:
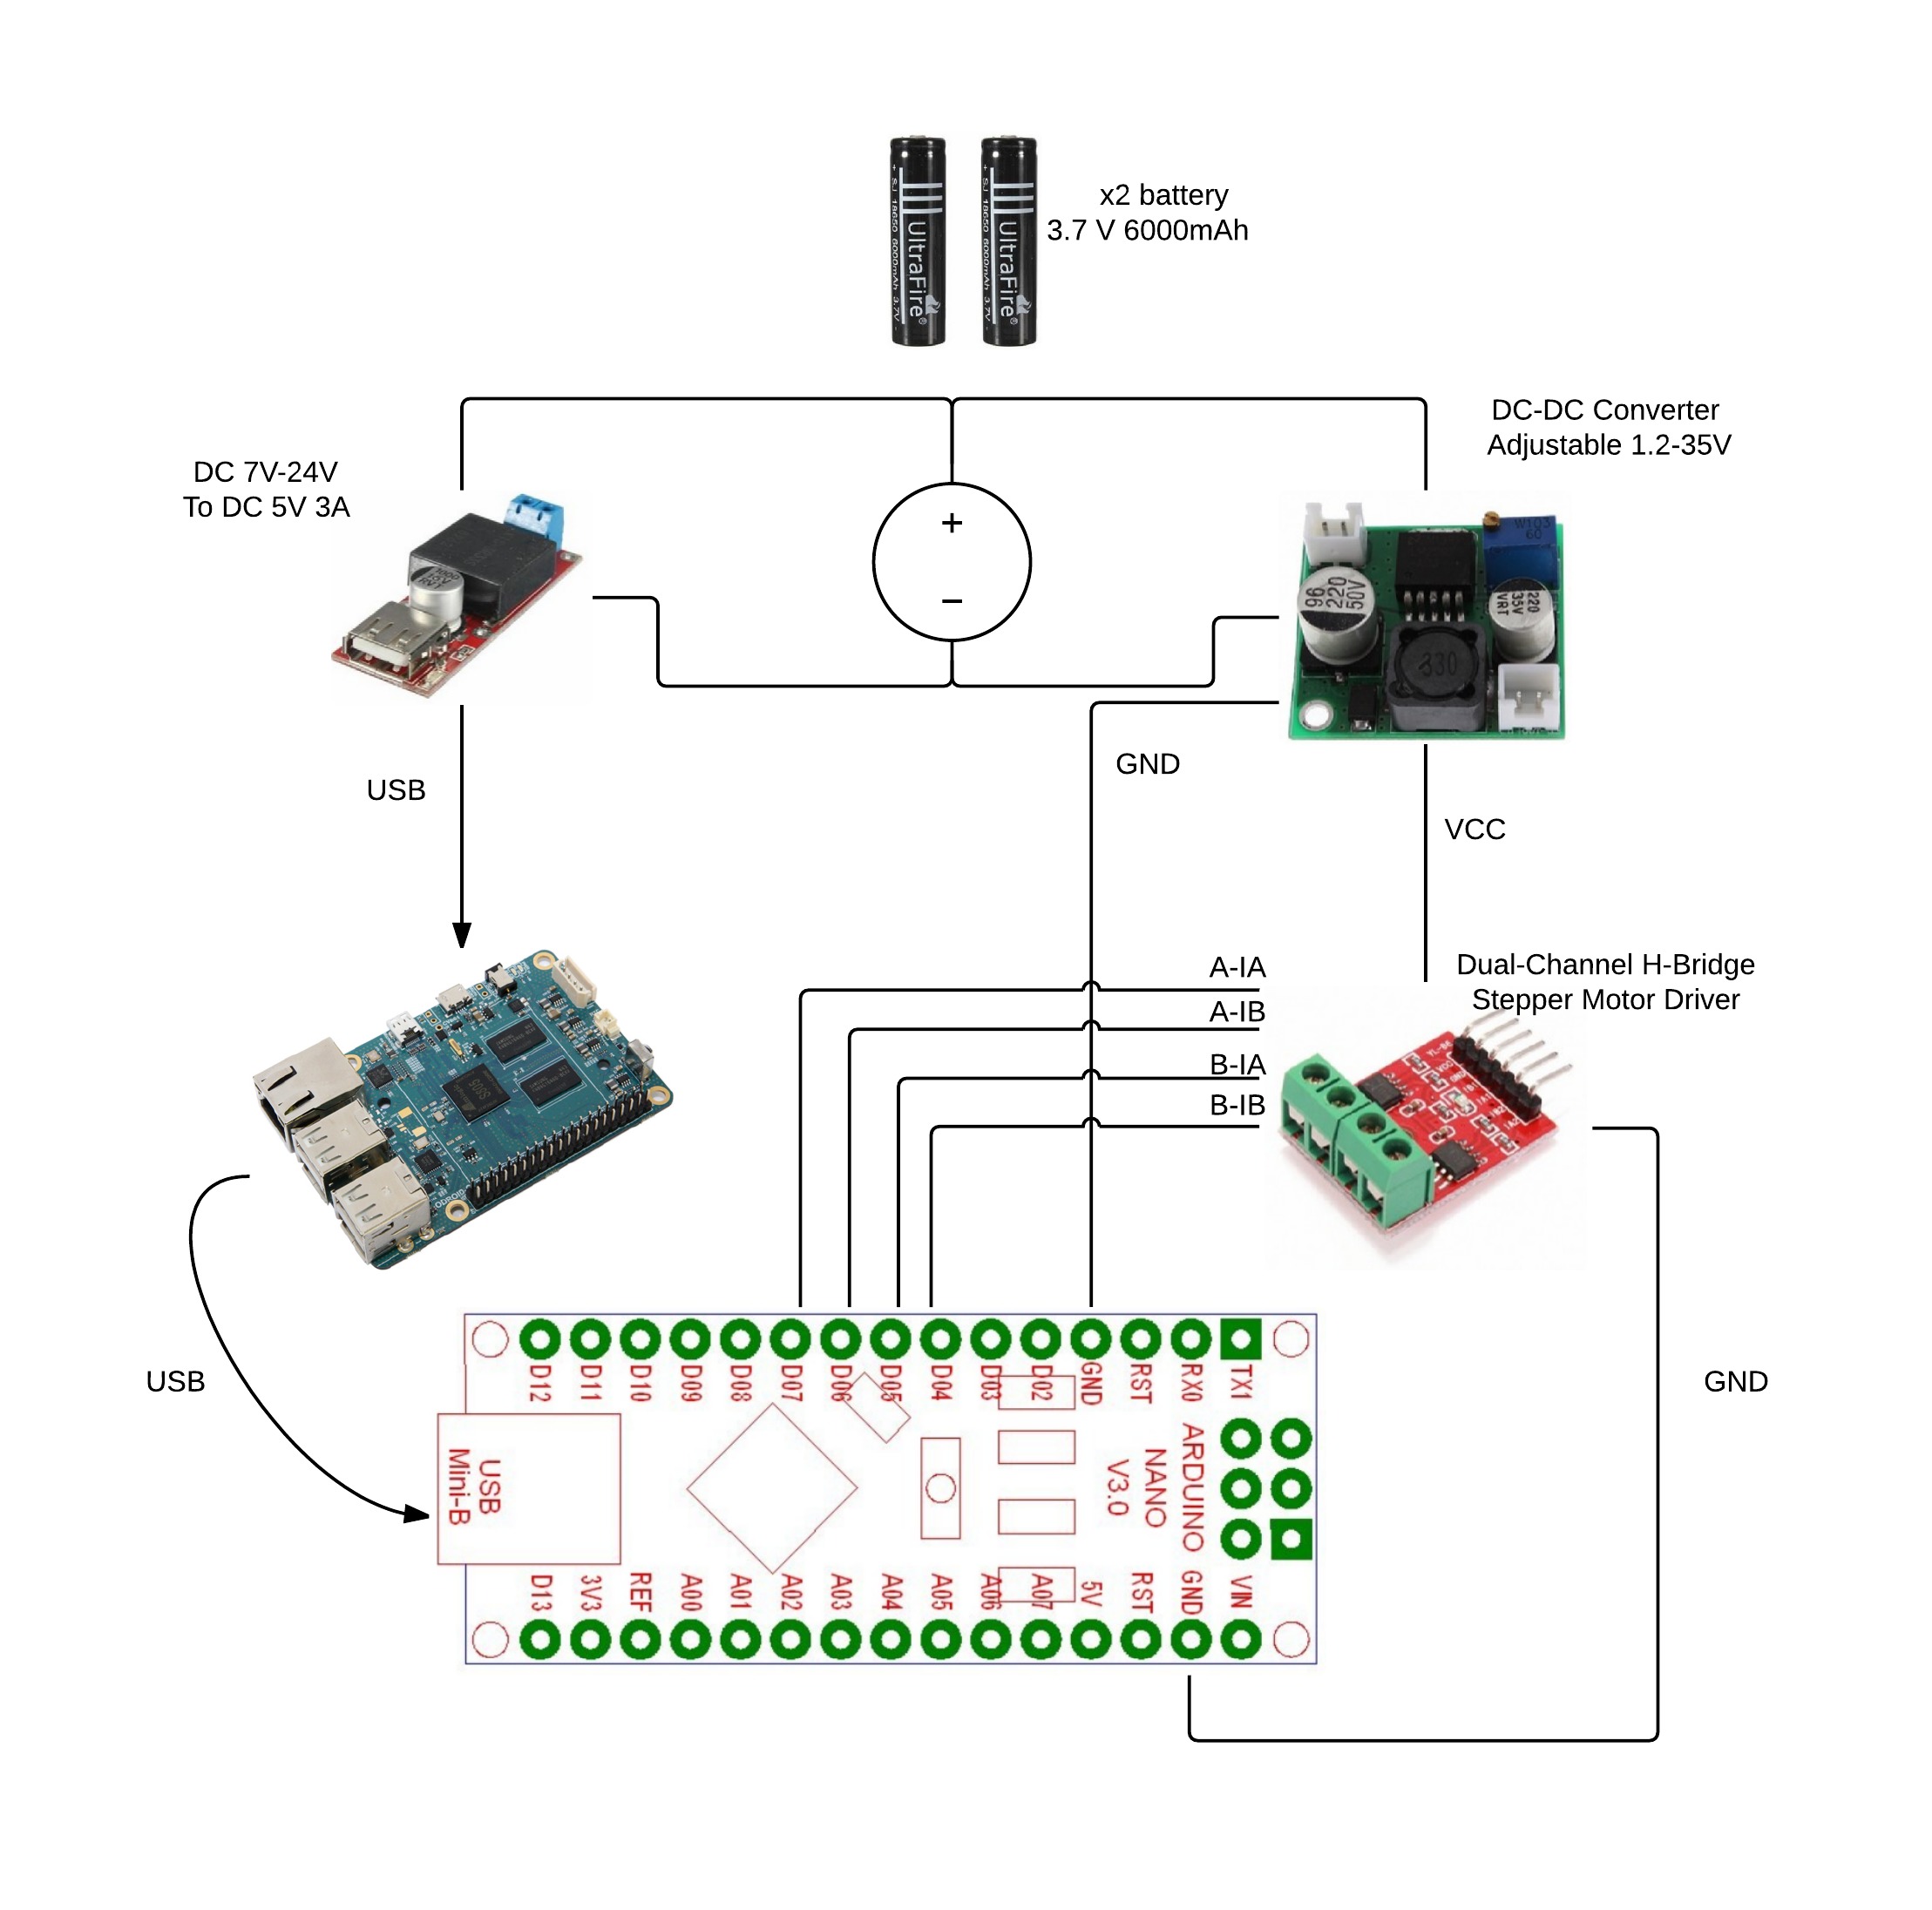
- Arduino nano
- Odroid C1
- Dual-Channel H-Bridge Stepper Motor Driver Module For Arduino
- DC 7V-24V To DC 5V 3A USB Output Converter Step Down Module KIS3R33S
- DC-DC Converter Adjustable Step Down Regulator Power Module 1.2-35V
- A webcam
- Wifi usb stick
Other components:
Installed on the Odroid board:
- SD Card with the last OS image of the oficial odroid repositry
- Python, pygame, python-serial (installed used apt-get)
Installed on the client. This is the PC that will controll the car. Consisting of a qt5 interface with tcp client that interacts with the tcp-python server in the odroid.
- QT5 and QT creator
- The eCat library. This library is used for the comunication between odroid and the arduino nano.
- Arduino software for configure the board.
Well, first of all we need to prepare the odroid board. For this we must install pygame and python-serial libraries, using for example the apt-get command.
Once it done, we can put the scripts for the automatic startup of the system. The scripts are: the python tcp server, the python http server for the streaming using the pygame library, and a script for configure the ad-hoc mode.
- OdroidServers.tar <- Here the three scripts.
Thanks to http://www.madox.net/ for his webserver!
Remember to disable the network manager writing in /etc/NetworkManager/NetworkManager.conf :
[ifupdown]

managed=true
This will able us to work tih the ad-hoc script.
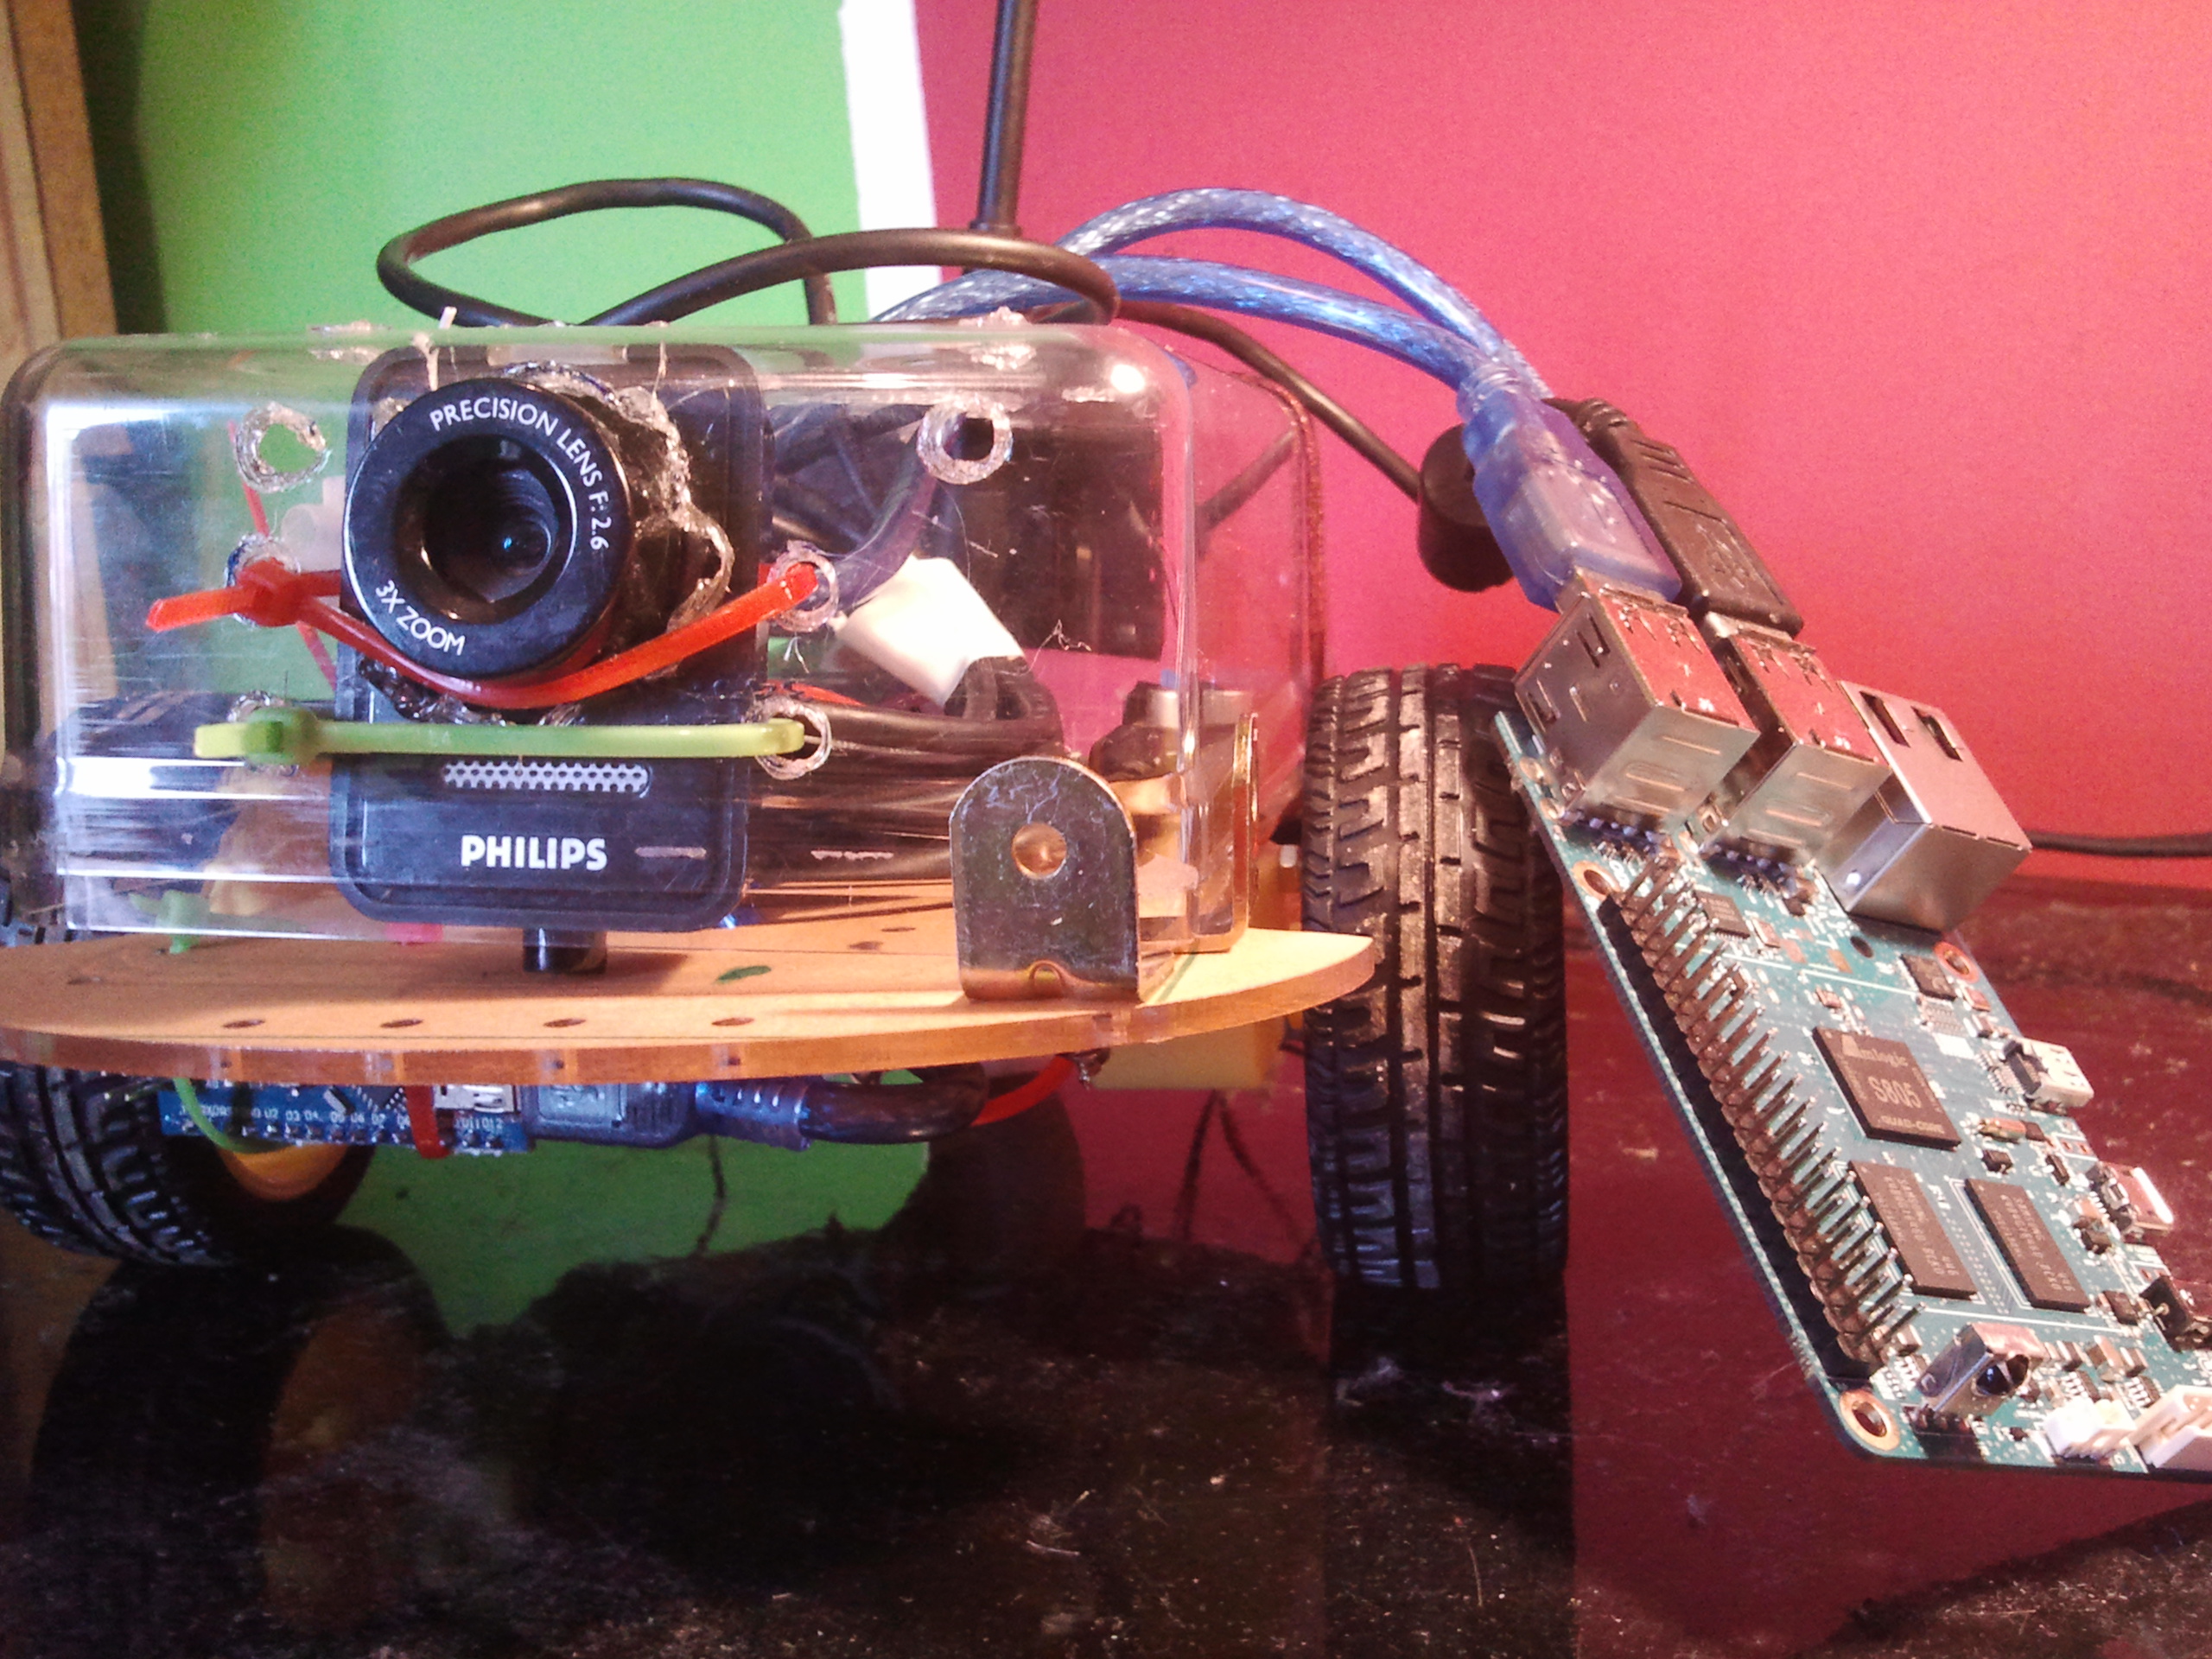
Then we can do the interconnection of the hardware elements:
And you can charge the sketch to the Arduino board:
Remember to put the eCat library in the correct path!
At this moment I will explain how the comunications work: the TCP client in the desktop send messages to the TCP server on the Odroid, and this, comunicate this messages to the Arduino board.
The messages that arduino understand are the followings:
- Forward: ‘fw’.
- Backward: ‘bw’.
- Stop: ‘st’.
- Left:’le’.
- Right:’ri’.
- On / Off: ‘on’ / ‘off’.
So if you want to make, for example a different kind of user interface (not in QT5), yo can follow this comunication messages for do it.
At last I’ll upload the QT5 aplication code:
- App.tar ** NOTE ** Don’t care about the UDP servers implemented. Use a direct TCP connection in the options dialog and put the odroid IP.
I think the better way for do the interface is a web based, like JS, HTML and CSS but is not yet implemented.
A video demonstration:
Odroid C1 + Arduino Nano. RC car with webcam Streaming from krolik on Vimeo.
Odroid c1 + Arduino Nano. RC ad -hoc mode (connected via ad-hoc to odroid)
from krolik on Vimeo.